I've had two or three folks having trouble with making their trees at 45 degree angles. There were comments on the Moda site and on my own blog post about it. This is SUPER important since the shape of the entire quilt depends on this. I am SO SORRY that folks are having trouble with this. I was intentionally a little vague in the original post because I knew that every cutting mat will be a little different and I thought I would save confusion by letting you figure it out on your own mat for yourself. CLEARLY, that was the wrong decision on my part. :) Please forgive me for the trouble this may have caused you. Hopefully this post will clear things up considerably.
Unfortunately, I no longer have the original quilt. My mother has it. 2000 miles away from here. So pretend that this crazy rainbow fabric looks like a Christmas tree. If you have toddlers like I do, it's not so hard to imagine after all. ;-)
Let's begin.
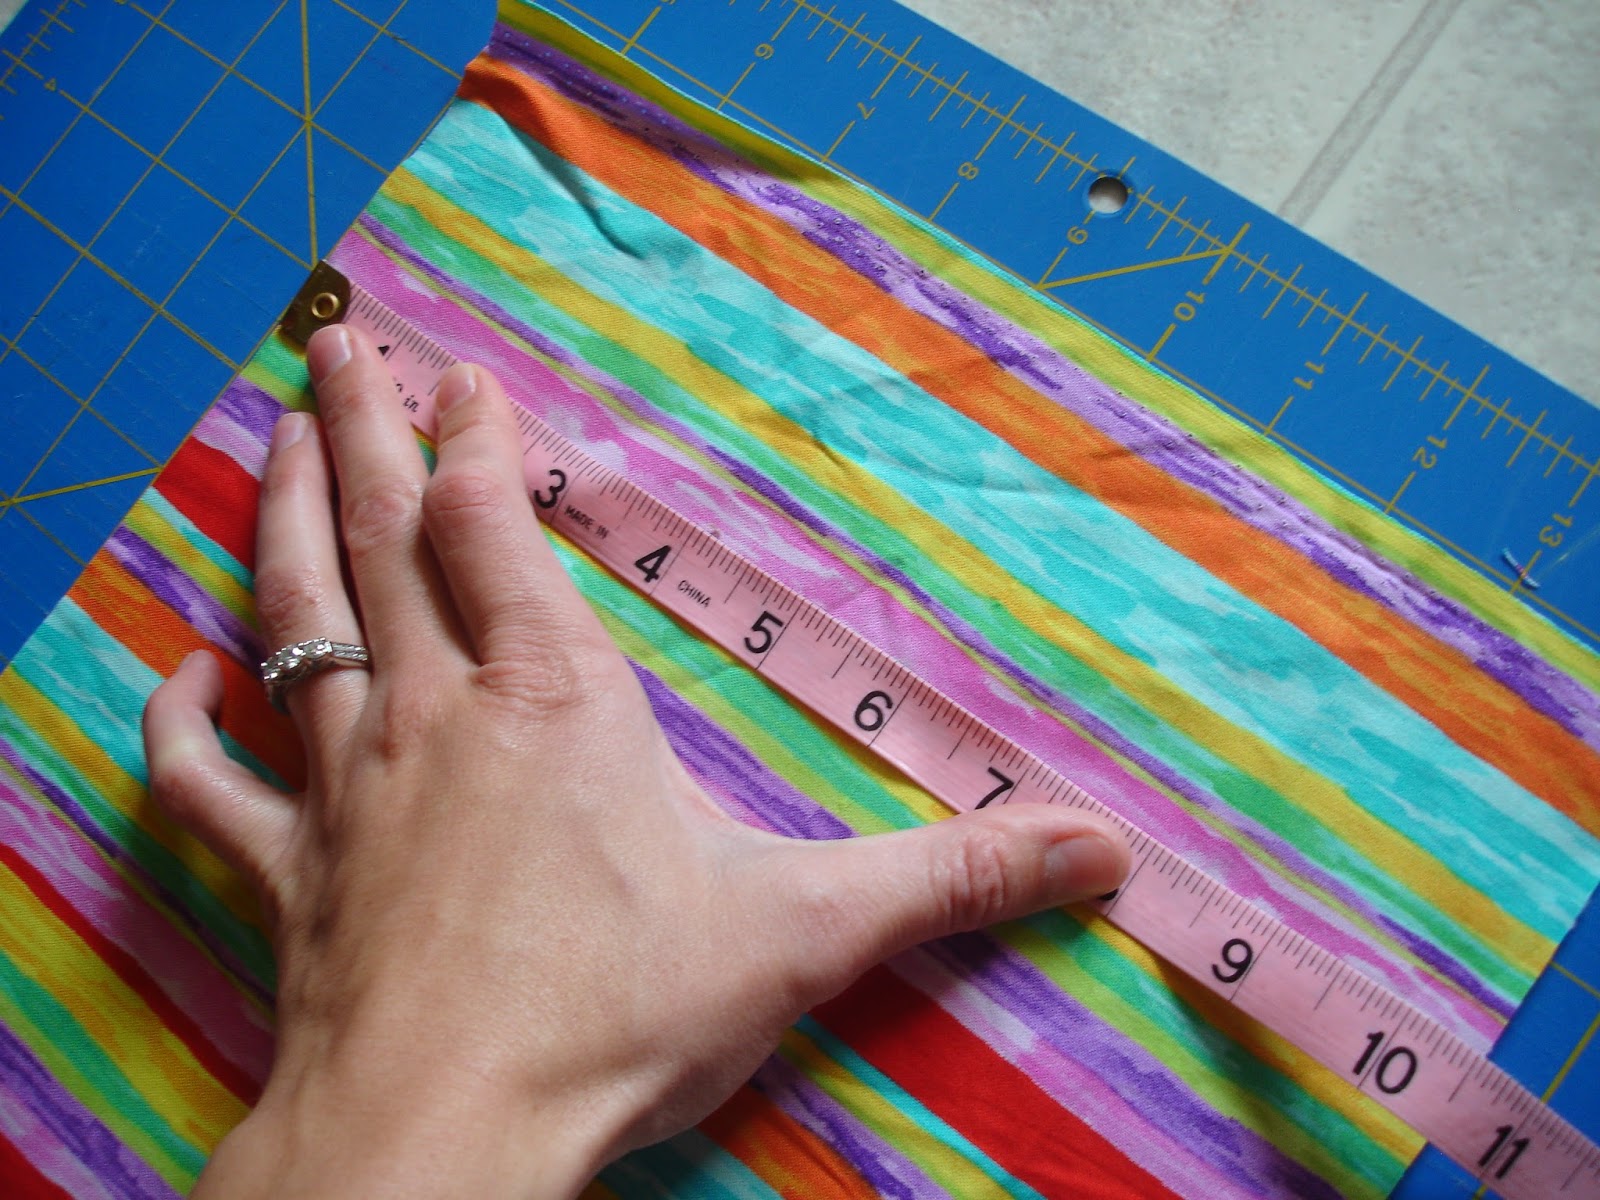
Your 5 strips (2 1/2" wide) sewn together should measure 10 1/2" top to bottom now. For demonstration purposes, I cut myself a 10 1/2" wide strip of fabric.
Below is a picture of my cutting mat. The first time I made a tree skirt like this, my trees were not 10 1/2" tall; instead they were 12" tall. So the black ink you see on my cutting mat was originally for a 12" tree.

Do you see this right angle here below? That's 90 degrees.

A closer look for you:

Half of 90 is 45, so this
is a 45 degree angle below. My cutting mat already has this 45 degree angle on it and I believe most mats do as well. When making my 12" tree (remember: yours is only 10 1/2"), I measured from that top point down both sides of my 45 degree angle 13". In different words: from that top point to where both sides of the 45 degree angle meet the black line is 13". Across the base of this new isosceles triangle measures 10". In other words: the black line is 10" long. The height of this isosceles triangle is 12", exactly what I wanted at the time.
I can still use this black line to help cut my new trees in triangles that are only 10 1/2" tall. First, line up your fabric along the black line:

Cut diagonally like so:

From that top point to the lower right side point should measure 11 1/2":
If you're right handed, as all the instructions so far have assumed (!), just turn the mat around or walk to the other side of it.

See how in the above picture your tree top point is not lined up like it is in the picture below? In order to get that 45 degree angle to come to a perfect point, I pulled my 10 1/2" fabric down to the intersecting point on my cutting mat:

Zoomed out, it now looks like this, with my fabric pulled back from that original black line, but still PARALLEL to it:

Cut along the 45 degree line:

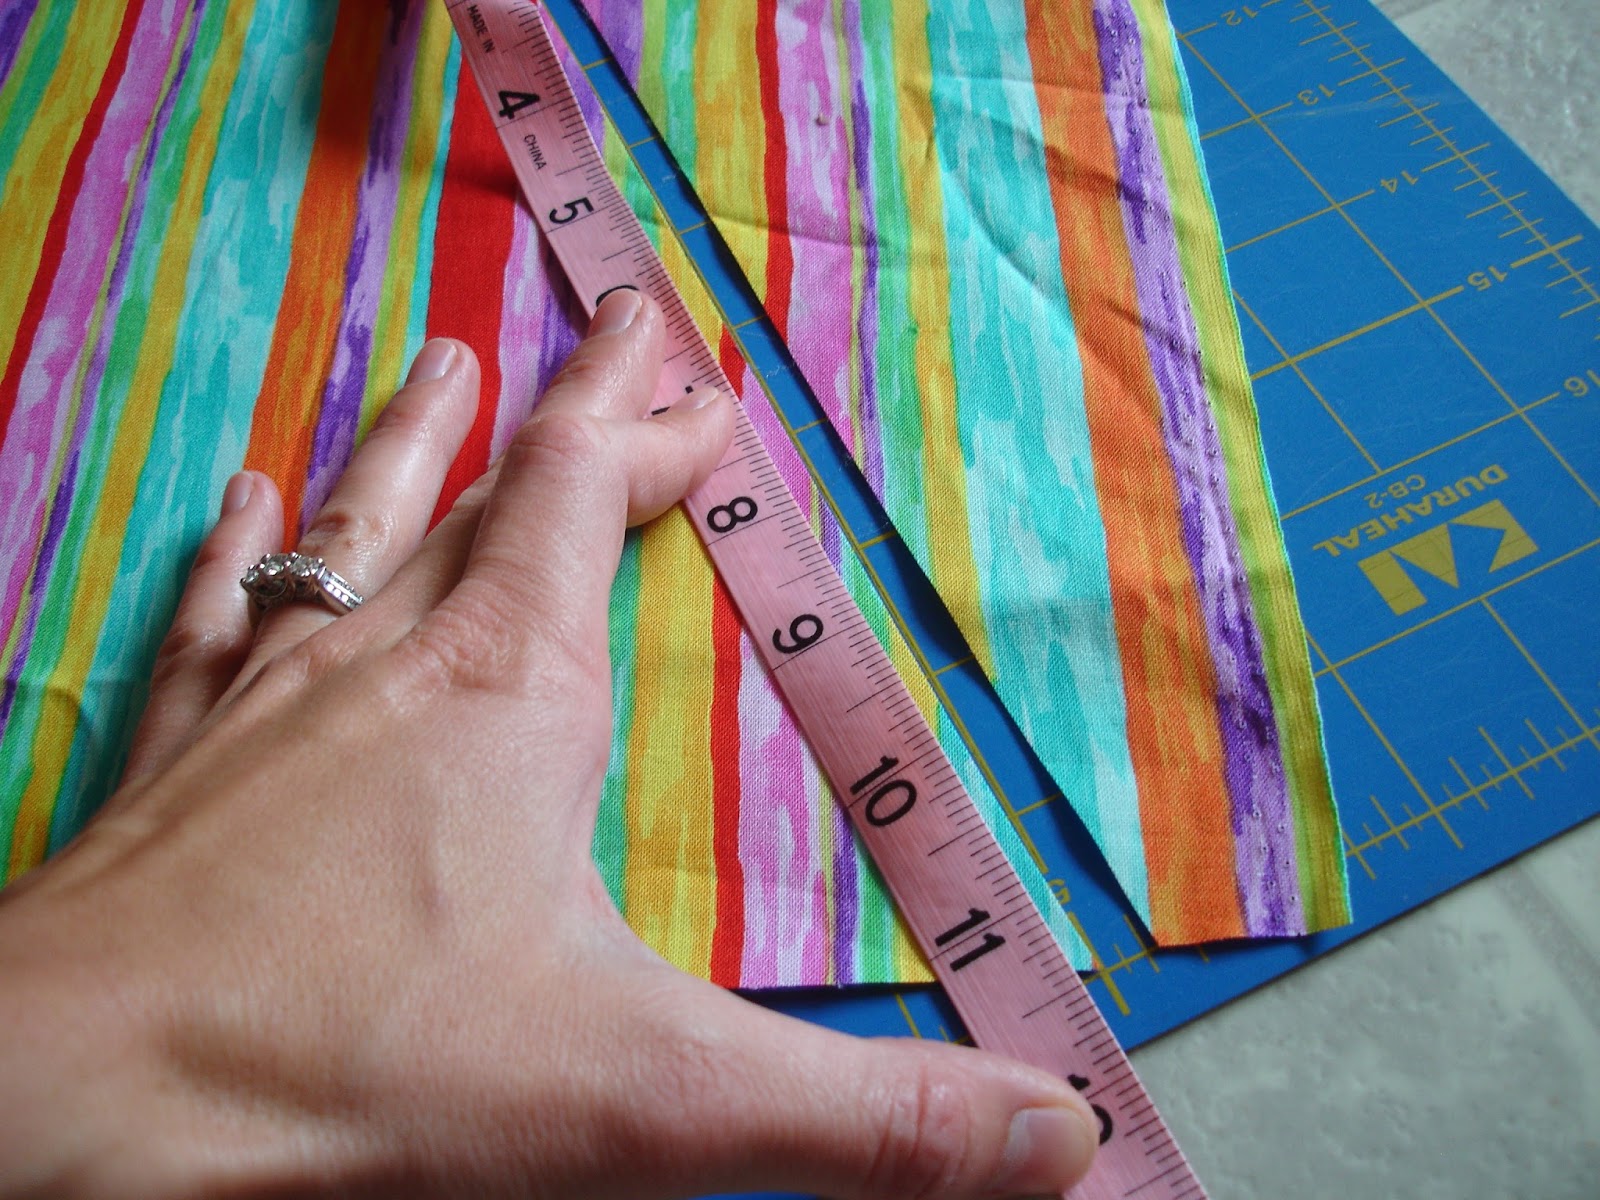
The base of your isosceles triangle should measure 8 3/4" inches:

The height should still be 10 1/2":

Ta Da! Wow, I hope this helps.
I don't have a black line on my cutting board to use as a reference and my 45 degree mark is awkwardly in the corner. I was trying to use my ruler's 45degree mark but this isn't helping either. I tried turning it and flipping it with no success to see and cut a 45degree angle. Any further suggestions for this newbie quilter?
ReplyDeleteOk, try this: Pick a right angle in the center-ish of your mat (say, where the 14" lines both meet). Now measure out 10" to the right, make a small mark, then go back to your 14" intersection and measure down 10" and make another small mark. Now use a ruler or cutting guide to measure the distance between the two marks you just made. I think it will be a smidge over 14". Make a mark at 7" and draw a line between *this most recent mark* and the original 14" intersection. Now measure how long that line is (we'll call this x). Then draw a line that is this exact same length (x) from the 14" intersection to the right towards your original *very first* mark. Do you see the 45 degree angle you just drew on your mat? I really hope this works. I'm running out of ideas to explain how to do this. :)
DeleteThanks so much Leah for re-explaining it for me!! Wow I give you huge kudos for all your help. I got confused with all the lines and just went back to the very beginning of the instruction on moda's site. I wasn't "seeing" where the 45degree angle fell within the triangle. Once I realized the 45 degree mark was the top of the triangle (45degrees x 8 triangles= 360 degrees) i just lined up my ruler to enable me to make a 45 degree angle at the top. Ended up needing two rulers instead of a black line, but it worked... at least I think. :o)
DeleteOne thing tho... my strips ended up being closer to 10 1/4" vs 10 1/2" like it should. I noticed this shrunk my triangle to be 11 1/4" on two sides and then 8 1/2" on the bottom. Will this be an issue in the end? I'm hoping it will just mean a "smaller" skirt.
Thanks again!!
So long as that angle is 45 degrees, your skirt should be just fine! And I think my measurements for the 10 1/4" were just approximate because mine ended up just being close to that, but not exact. So you're all good!!
DeleteAnother approach would be to make a paper template with a 45 degree angle: Take a square or rectangular piece of paper (printer paper, for example, and fold it by bringing 2 adjoining edges together. By doing this you have halved the corner, which is 90 degrees, to the required 45 degree angle. you could either cut along the fold, or use the folded paper as the template for the angle.
DeleteI had foolded all day with this old pattern anc couldn't figure out how andd still confused but will try some of your tricks thanks ellen
DeleteTwo questions: 1) did u place a seam somewhere on the backing? My skirt is several inches wider then my 42" fabric. 2) any tips on binding circles & those "corners". I'm going to machine bind it yet realized I only have 2 sorta 'right' angles.
ReplyDeleteI was able to fit mine on some 44" wide fabric, but I realize that especially after washing, your fabric may not be wide enough. So yes, you will probably need to add some fabric to make it wide enough. Bummer. =/ As for binding the corners, it should be very similar to binding regular right angles, just making that angle a bit wider. I've done this a few times now and it's done just in the same manner. I think you should give it a go and if you're still having trouble, I will try to think of a way to explain it and/or some pictures to help. :) I'd love to see a picture of it all when you're done!!
Delete